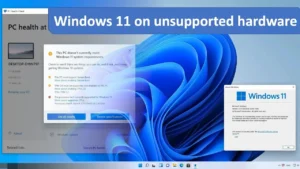
How to Install Windows 11 on Unsupported CPUs: Are you eager to upgrade to Windows 11 but frustrated by the roadblock of unsupported hardware? You’re not alone. With Microsoft’s latest operating system requiring more stringent system requirements, many users find themselves stuck with older CPUs that don’t meet the criteria. But fear not! In this blog post, we’ll explore how you can navigate this challenge and install Windows 11 on your unsupported CPU. By following a few simple steps and utilizing some clever workarounds, you can breathe new life into your aging hardware and enjoy the features of Windows 11. Let’s dive in and unlock the potential of your PC!

How to Install Windows 11 on Unsupported CPUs Step-by-Step Guide:
- Check System Requirements: Before proceeding, ensure your computer meets the minimum requirements for Windows 11, except for the CPU compatibility.
- Download Windows 11 ISO: Obtain the Windows 11 ISO file from the official Microsoft website or trusted sources.
- Prepare Installation Media: Use tools like Rufus or the Windows Media Creation Tool to create a bootable USB drive with the Windows 11 ISO.
- Download and Install TPM Emulator: Obtain a TPM Emulator tool like “tunaks” or “TCG Loader” from reputable sources.
- Enable Secure Boot (Optional): In your computer’s BIOS settings, enable Secure Boot to mimic one of the Windows 11 requirements.
- Modify Registry (Optional): Use registry hacks to bypass CPU compatibility checks during installation. This involves changing specific values in the Windows Registry.
- Begin Installation: Boot your computer from the USB drive and proceed with the Windows 11 installation process.
- Install TPM Emulator: During installation, when prompted for TPM (Trusted Platform Module), use the TPM Emulator tool to bypass the requirement.
- Complete Installation: Follow the on-screen instructions to complete the installation of Windows 11.

Risks and Benefits:
- Risks:
- Unsupported configurations may lead to system instability or compatibility issues with certain software.
- Limited access to official updates and support from Microsoft.
- Benefits:
- Access to new features and improvements introduced in Windows 11.
- Extended support for security updates and patches.
Alternative Solutions:
- Consider Dual Booting: Install Windows 11 alongside your current operating system in a dual-boot configuration to minimize risks and retain compatibility with existing software.
- Upgrade Hardware Components: If feasible, upgrade components like the CPU or motherboard to meet the requirements for Windows 11 officially.
Tips for Optimization:
- Regular Updates: Stay updated with the latest drivers and patches to enhance system stability and security.
- Optimize Settings: Disable unnecessary features and background processes to improve performance on older hardware.
- Use Lightweight Software: Opt for lightweight alternatives to resource-intensive software to minimize strain on the system.
- Regular Maintenance: Perform regular maintenance tasks like disk cleanup and defragmentation to keep the system running smoothly.
By following these steps and precautions, you can successfully install Windows 11 on unsupported CPUs while minimizing risks and optimizing performance.

Minimum Windows 11 Requirements
Processor:
- 1 gigahertz (GHz) or faster with at least two cores on a compatible 64-bit processor or system on a chip (SoC).
RAM:
- 4 GB or more
Storage:
- 64 GB or larger storage device
- Note: Windows 11 requires a minimum of 64 GB of storage for installation and updates. However, additional storage may be required over time for updates, temporary files, and other system files.
System Firmware:
- UEFI, Secure Boot capable
TPM:
- Trusted Platform Module (TPM) version 2.0
Graphics Card:
- DirectX 12 compatible graphics / WDDM 2.x
Display:
-
9″ with HD Resolution (720p)
Internet Connection:
- Internet connectivity is necessary to perform updates and to download and take advantage of some features.


